How Can You Tell if Your Ceiling Fan Has a Brace on It
How To Install a Ceiling Fan
Baronial nineteen, 2021
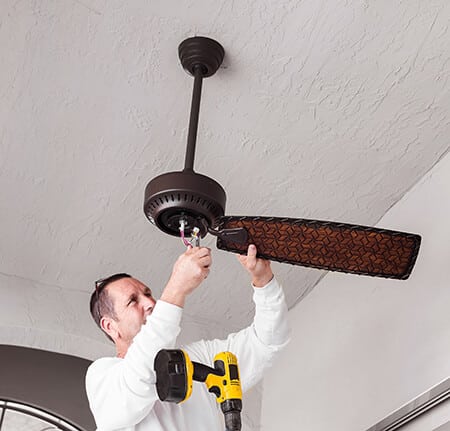
Since its invention in 1882, people effectually the world take used ceiling fans as a convenient manner to cool rooms of their home. If y'all're installing a ceiling fan in your home and don't know what steps to have, it can become a frustrating and time-consuming hassle. Here are the steps you can take to get the job done right and save yourself the stress.
Prepare the Space
Earlier even purchasing the ceiling fan, you should know the gauge size of the room you're installing it in. Brand certain the fan tin be securely anchored to an electric ceiling box that's designed to hold both the wiring and the fan itself. If you program to be able to control the fan from a light switch, affirm that the switch is wired correctly.
Next, do a quick check for any other wiring or pipes that could go in the way of the fan'south installation or that could affect its office. Additionally, cheque to see if you have an electric box that supports a ceiling fan, every bit installation won't work without one.
There should be an inscription on the ceiling fan box that indicates whether or non your existing junction box is designed for ceiling fans. If information technology's non, yous'll need to replace it with a fan brace and junction box that's rated so that it can safely concur the weight of the fan.
Finally, turn off the power to the fan at the electric console and use an appropriate testing device to ensure that no power is going to the lite fixture so that you can brainstorm the installation safely.
Turn Off the Ability on Your Outlet
Head to your excursion breaker and switch off the power. All wall switches should also exist in the off position. You tin place tape across the switches to keeping anyone from messing with them while you're installing the fan.
Mount the Junction Box
If you have an existing fan or fixture, yous'll demand to take information technology down and make certain all wires are disconnected. Y'all'll want to go your screwdriver out at this point and get ready to jump into action.
Start by inserting the fan brace through the hole in the drywall, making sure it gets fit firmly on the ceiling. You'll know you lot've done it well if the foursquare tube of the brace is centered with the hole.
Next, apply your hand to rotate the fan brace until it locks into the joist. Equally y'all continue to make progress, make sure to feel around with your paw frequently, ensuring everything feels secure before moving on to the adjacent step.
Now, attach the U-bolt bracket to the fan brace, making sure the bolts are facing downward and that it'due south centered in the hole. Then, thread the cable wire into the junction box, slipping the box upwardly so that the bolts can slide through it. To secure the box into the right identify, tighten the nuts thoroughly.
The Bracket Gets Mounted
Thread the wires carefully through the center of the mounting bracket. To make sure you lot're completing this footstep correctly, it's important to follow the manufacturer's instructions carefully.
The fan may or may not have a slide-on subclass. If information technology does, you tin keep the mounting bolts attached to the junction box and just slide the fan bracket directly over the mounting screws, tightening them thoroughly.
If your new fan does not include a slide-on subclass, but place the bracket over the bolts that poke through the bracket. Use the nuts that come up with the fan to spike it securely.
Set up the Downrod
If your ceiling has a steep angle or is sloped in some way, a special downrod will exist required. Equally long equally your ceiling is flat, the downrod that comes with the fan should work perfectly.
Get-go past slipping the canopy onto the downrod on a flat surface, running the main wires completely through. And so, the clevis and cotter pins should be inserted into the downrod, assuasive it to connect to the fan'south base.
At the top of the downrod, you should notice a bulb-shaped fitting. Attach this securely to the bracket now mounted on the ceiling. If putting in a flush mount fan, you'll demand to detect the awning band and thread the electrical wiring through the middle.
At this point in the process, take a step back and brand certain everything looks to be in order.
The Fan Gets Wired
Some mounting brackets come with a hook, which yous tin place the fan on to continue it out of the way while you work. If information technology doesn't have one, you may need to get someone to hold the fan in place while you wire it.
Begin by connecting the fan's wires to your home'due south wiring. If in that location are additional wires, you'll need to refer to the transmission for specific instructions.
Lucifer the wires by color (e.g. yellow wire with yellow wire, etc.). It's often the instance that the fan's insulated wire (typically a copper or greenish colour, simply check your manual to confirm) will connect with the ground wire. The light kit wires, which should be blueish or striped, will connect with the blackness supply wires.
Make sure all wires are properly continued, then push button them directly into the junction box. If the wires tin't fit, yous can use wire cutters to carefully cutting them.
Lastly, clip the canopy onto the mounting subclass and tighten the screws well.
Adhere the Blades and Seedling
Be sure all of the hardware included is out and prepare for yous to utilize.
Start by attaching the bract brackets to the fan blades. Don't tighten whatsoever of the screws until they're all slightly screwed into each blade. Then, attach the blades to the fan.
If the fan comes with quick-install blades, you tin just put the blade arm posts through the blade keyhole slots, ensuring that it's aligned correctly. They should click and lock into place when you slide them outward.
If the fan doesn't have quick-install blades, the fan blades tin be screwed onto the blade arms. Be sure that the portion of the blades that yous want to accept visible are facing downwards when completing this step.
Some fans come with accu-arm blade brackets with the bract screws already attached. If your fan doesn't feature accu-arm bract brackets, you'll need to use two screws to fasten the blade assembly to the motor, slowly driving the screws in to avoid whatsoever stripping or bending.
Finally, if the fan comes with a light bulb, information technology'due south time to install it. Since there are many variations of ceiling fan calorie-free bulbs, it's all-time to follow the specific instructions in the transmission for this final step.
At Brennan Electric, we're here to assist with any of your electrical needs in Seattle, WA, and surrounding areas. Whether it's a ceiling fan or a generator, we offering installations, repairs, and assessments to keep your electrical appliances working at their best. A few of our many electrical services include home electrical inspections, panel change-outs, circuit upgrades, and calorie-free fixture installations. Contact us today and get ready to experience meridian-notch electrical service you can rely on.

Areas Nosotros Serve
Rex County, Snohomish County, Pierce County, Kitsap County, Lewis County, Thurston County, Mason Canton
Call us Today at i (877)-BRENNAN
garneryouncesomed.blogspot.com
Source: https://brennan-electric.com/how-to-install-a-ceiling-fan/
Belum ada Komentar untuk "How Can You Tell if Your Ceiling Fan Has a Brace on It"
Posting Komentar